
How to replace the door speakers in a 2011 Volkswagen Jetta

Some time back we purchased a high mileage 2011 VW Jetta (2.5L) (200,000 km+) which has been fairly reliable. One of the items that did fail was the left front speaker. It was somewhat intermittent as Bluetooth voice calls would seem to be affected the most almost to the point of not being able to hear the other party in louder environments such as the highway. The car is EXTREMELY dirty and this will be evident in the pictures. It was washed after.
This car came with the most basic audio options, if your model has one of the more competent options such as a Fender system, this guide may not be directly applicable but the procedures for removing the door speakers should be very similar. I did upgrade the stock radio with a RCD330 over a year ago which was a pretty easy plug and play operation.
I will cover the installation of the drivers’ side front door in this article but the other doors are the same the exception of a few screw locations and somewhat less connectors into the door panels.
Tools used

These are most of the tools used during the process. Having magnetic tips for the Torx bits would have been very useful. The right side door had a whole right below are that the screw comes out of the lower part of the armrest. When the screw fell in, I had to partially remove the door to retrieve it.
4 Stages for each door
Door panel removal
Old speaker removal
New speaker install
Door panel reinstall
1. Door panel removal
Plastic removal tools are highly recommended for removing the door panels after the screws are out. VW utilizes Locktite on the screws for unknown reasons. I am not sure how strong the adhesive is but some of the screws will be tight until they are almost completely removed.
Screws #1, #2 and #3 requires a T30 torx bit. #4 requires a T20 torx bit.

There are 4 screws that have to be undone before the door panel can be removed. Only screw #4 is exposed. It can easily be undone with a T20 bit. Plastic trim and panels have to be removed before being able to access screws #1, #2 and #3.
The plastic trim hiding screw #1 can be gently undone with plastic trim tools as shown below:

Be very gentle while using the plastic tools between the trim. The “hard wearing” plastic on the door panels are very rugged and strong but care should still be used

The plastic tools can be used to remove the plastic panel with the window winding switches. The electrical connector will require using a small screwdriver or similar tool to easily loosen it
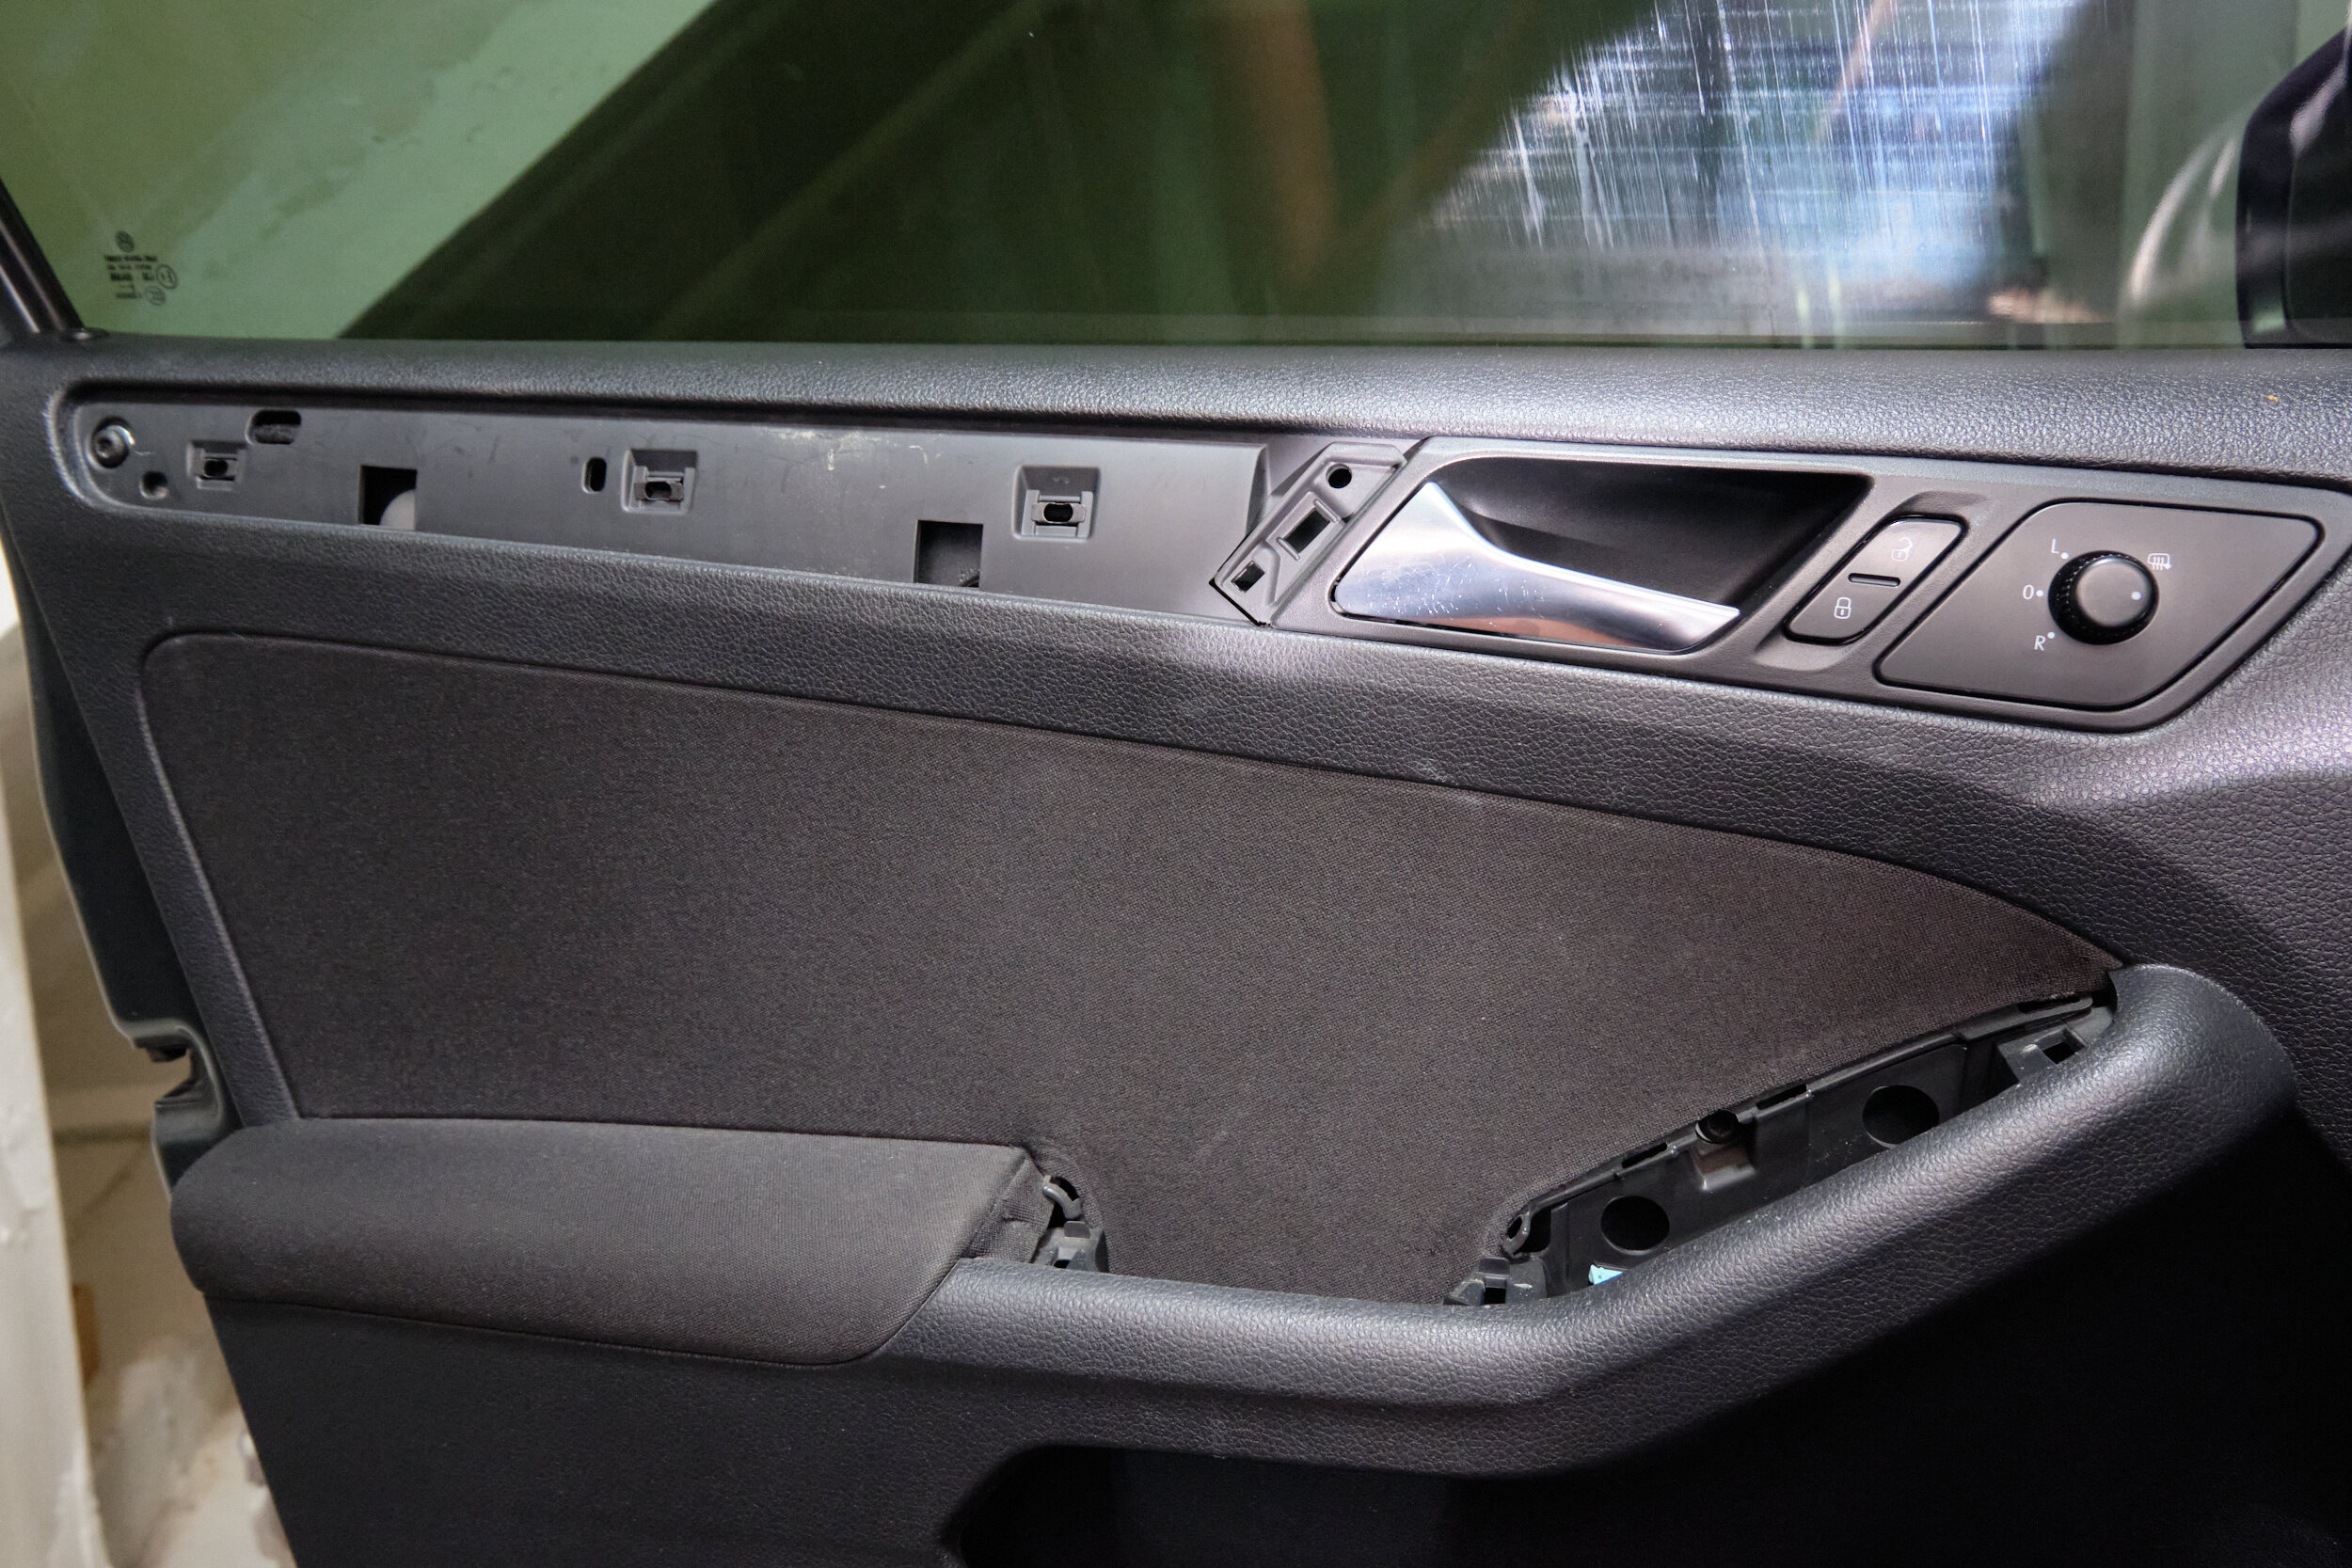
Plastic panel removed

The screw is located closer to the edge of the door.

The screw near the handle bar can easily be accessed after the plastic panel with window winding switches are removed

There is a plastic panel covering the screw above. The lower part will have a space to squeeze fingers to pull the plastic panel out. I had to use an unreasonable amount of force to do it.

This image is from the back door but you will need to use the plastic tools to gain some leverage between the metal and the door panel. It may require trying different plastic tools and twisting them carefully to pop the plugs holding the plastic panel to the metal. That care is to avoid damaging the pain. Popping the plugs requires quite a bit of force.

Once all the clips are unplugged, the panel will have to be lifted to clear the top part of the door.

Pull carefully on the door as there are a few connectors that need to be removed.
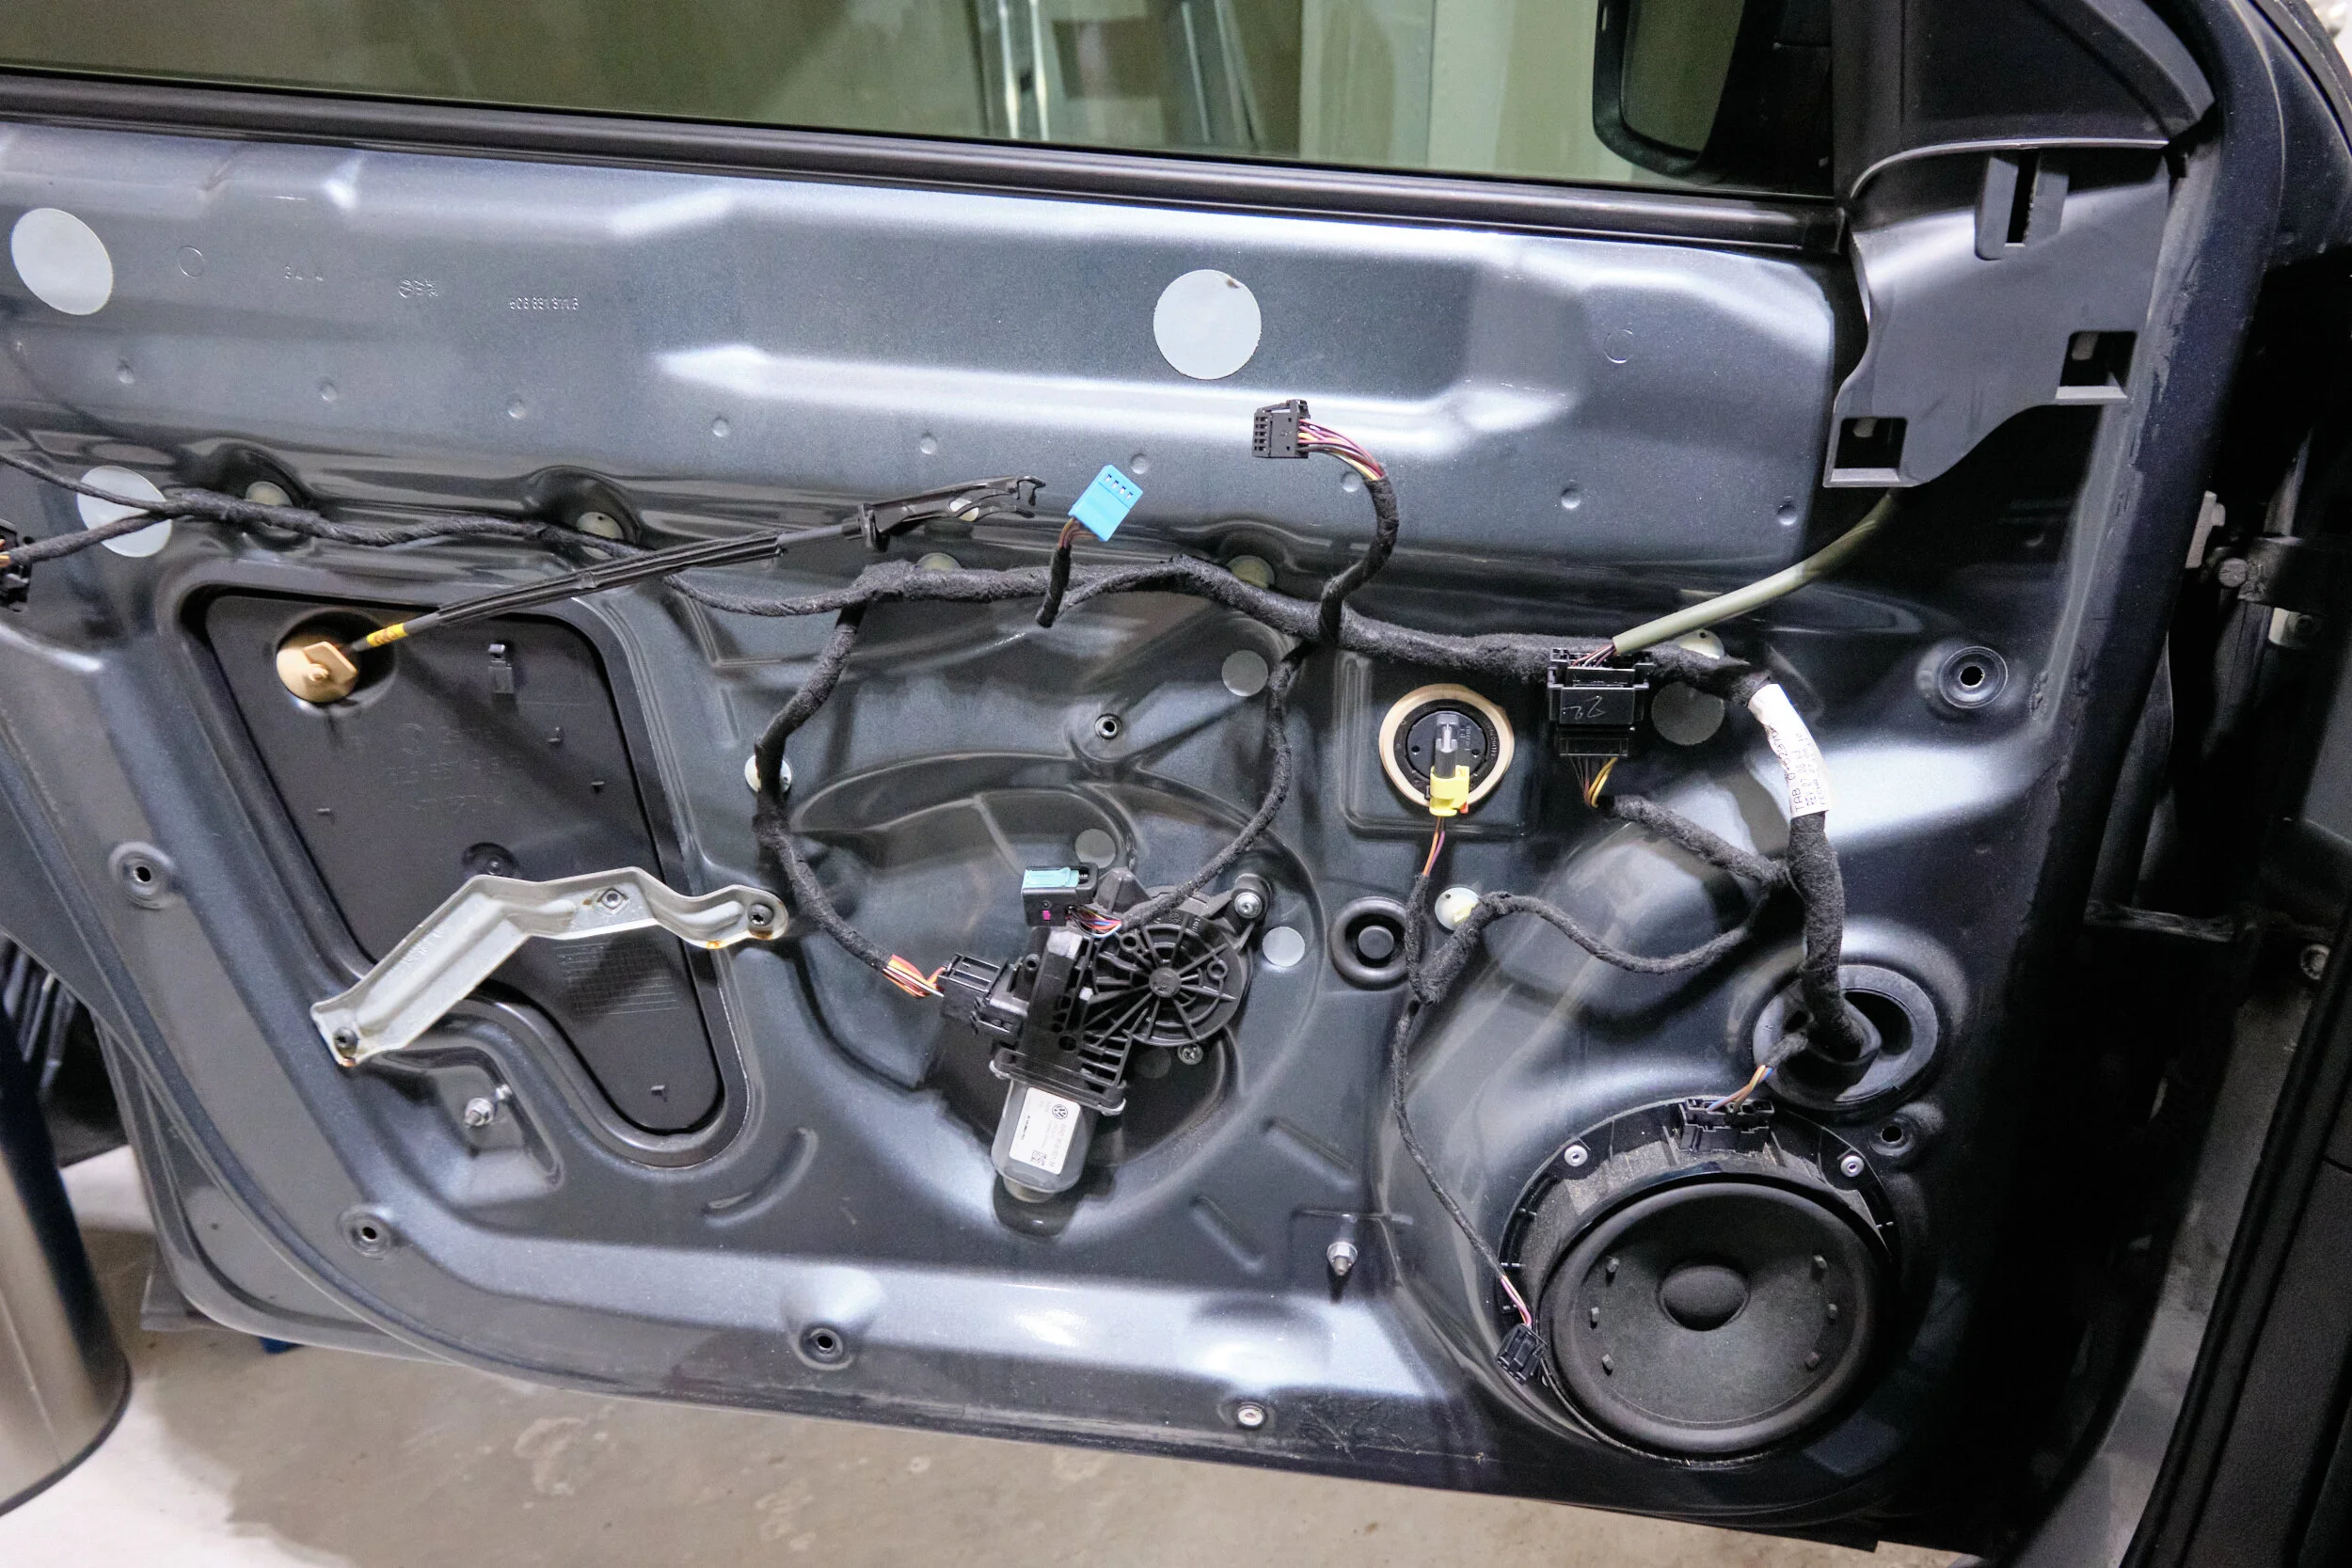
This is what the door looks like with the plastic panel off.
2. Old Speaker Removal

Carefully unplug the connector for the speaker
The speakers are attached to the doors with rivets. I hope there are better ways to remove rivets but I had to resort to using a drill.

Drilling the rivets

Drilling just enough to remove the top of the rivets
When starting on the first door, I only drilled enough to remove the top of the rivet to get the speaker off. By the time I got to the last two doors, I had started drilling all the way through on the first go which yielded better results but not always. Ensure that the glass window is all the way up. When going through the back part of the rivet, the tip of the drill bit could touch the back of the door or shatter the glass if it was down.

This is what the bits look like when drilling all the way through in one go. This was one of the right doors.

There is rubber which may have had sided tape holding the speakers to the door even after the rivets removed. I tried to leave as much of it in place as possible to use with the new speakers.

Removing the remaining rivets can be a challenge but will need to be done before moving to the new speaker installation

Attempting to remove rivets

I went through various bits in some cases depending on how stubborn the rivets are.

Getting one out. Some persons hammer these out but it tends to deform the door panels and even though they can be restraighten, I was not comfortable doing that. I did try gently tapping in with a hammer but the force required to hit the rivet out would definitely deform the metal.

This is is what the end of the rivet could look like

The rivet in the top left was so tricky, it “required” drilling through some of the metal to dislodge it. I say required as I should hope there is a better way to remove these than what I actually did but the metal was not bent in the process. The larger hold also did not affect the installation of the new speakers.

The drilling creates a lot of metal particles that should be vacuumed up or otherwise cleaned up.
3. New speaker install
The speakers were purchased from Crutchfield. I had been looking at doing this project for weeks but it was not quite clear which speakers would fit and which adapters would be needed to go over the door panel. Crutchfield allows you to select your car on their website and it will list the speakers that fit and the adapters required. I am not in anyway affiliated with Crutchfield.

The Jetta uses similar sized speakers in the front as it does in the back so I ended purchasing two of these.

There were other compatible speakers on the Crutchfield site but I picked this one at random. If you are an audifile, you may want to give the selection some thought and compare reviews.

Each speaker comes with a cover but we will not be using those.

The plastic ring on the left was recommended by Crutchfield to allow this speaker to fit in this car.

This adapter was also recommended so that there would be no need to cut the stock VW wiring.

Be careful when plugging the connector into the speaker terminals. I used a little too much force and broke one of them. Luckily, the wires are still intact and it did not affect the functioning of the speaker in anyway. You will need to attach the plastic ring to the car door and run the connector though a small hole before connecting the connectors to the speaker.

The plastic rings come with these metal clips to fit over the holes. Not sure if it is necessary but I did tear away some of the remaining rubber ring to create space for the clips as it did not appear that it clip on otherwise.. They can be tricky to attach. Some of them clipped on without issue while some required using a rubber mallet. The rear ones gave a lot more trouble than the front ones. It almost indicates that the rear ones require a different size clip. After much work I was still able to get them all in for every door.

After screwing in the the plastic ring, it should look like this. Try to align that small hole at the top to be as close to the speaker connector from the car as possible.

Plug in the speaker connector adapter and run it through the hole in the plastic ring. They can then be plug into the speaker before screwing it into the plastic ring.

I recommend screwing in the screws slowly to ensure the speaker is properly centered before tightening them all. This is also a good time to test and ensure that the speaker actually works as expected. If do you turn on the car without the speaker connected and scan it with a code reader, there will be error codes relating to the speaker not being present but that can be cleared after.

This is what it looks like with the speaker fully installed.

This is the back left stock speaker before replacing it. It did not appear to be defective but the replacement JVC speaker sounded much better in volume and fidelity. The same process will apply but some of the screws to remove will be slightly different and there will be less connectors to disconnect.

This is the front right door after the new speaker has been installed.

At this point, you can put the door panels back on in the same order that they were removed while also ensuring to reconnect all the plugs but I did something extra that was unnecessary.
4. Door panel reinstall
North American MK6 VW Jetta’s have very light doors. I did own a right hand drive 2013 Jetta of the same shape from another region of the world that was a lot more solid in feel. I decided to add some noise reduction padding and weight to the doors.

The door panel consists of a lot of “hard wearing” plastic.

This is what the inner side of the panel looks like.

I had purchased some Noico Noise reduction material and a roller. I only purchased about 10 square feet and only applied it to the plastic panel.

It is not perfect but there should be some minimal improvement. It is normally recommended to apply it extensively to the inner metal and any parts of the plastic door panel to really be effective and make a substantial difference. As I did no testing without the noise dampening material with the new speakers, I am not able to comment on if it makes any difference to sound quality or highway noise reduction, etc. The North American VW Jetta is also a fairly low quality vehicle material wise, it would likely need extensive material applied all over the car including the entire floor under the carpet, headliner, etc to make a significant difference while also adding weight. The image above also shows the 7 plastic plugs that attach firmly into the door.

This is the door with the plastic panel back on before all the pieces back on.
Given the time and effort this project took, I am not sure I would do it again but did get quite proficient towards the end when doing the last doors. Hopefully this post will help anyone that decides to take this on.