
How to Photograph a great Sunset : 14 Tips anyone can use

Over the years, I have not been able to stop myself from taken images of beautiful sunsets when I see them. I have posted a few of them while going over 14 Tips to help you capture great sunsets no matter where you are , if you have just your cell phone or a $5000 mirrorless camera.
Tip #1 - Underexpose
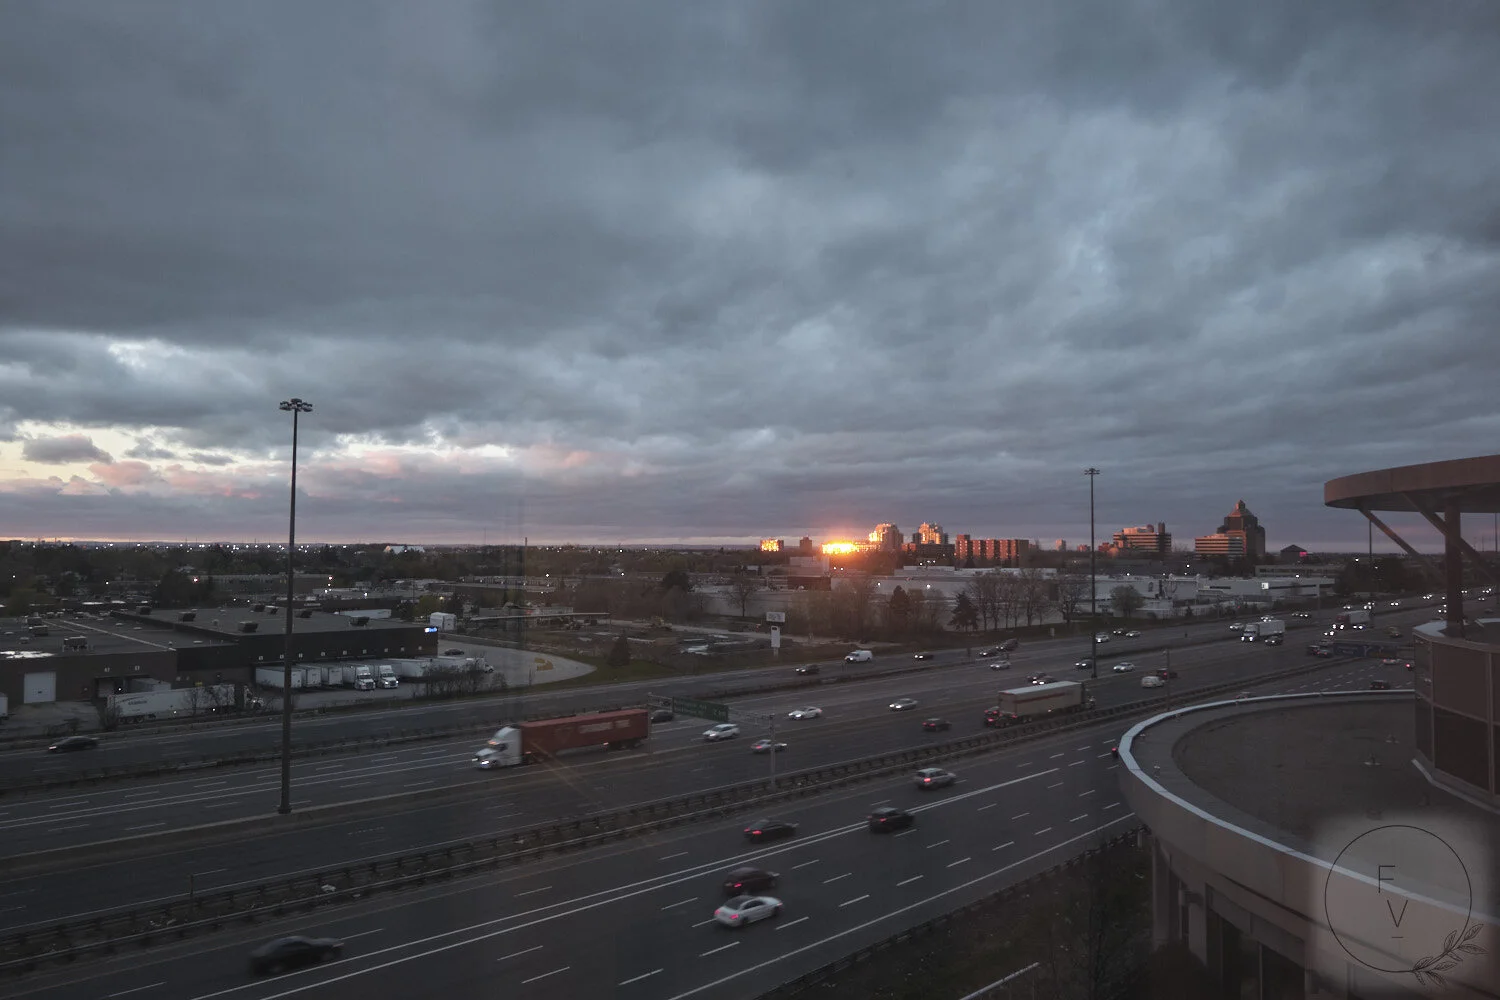
The sun is an extremely bright light source so the auto exposure setting on your camera or phone will likely focus on just how bright the entire scene is and over expose it as shown below.

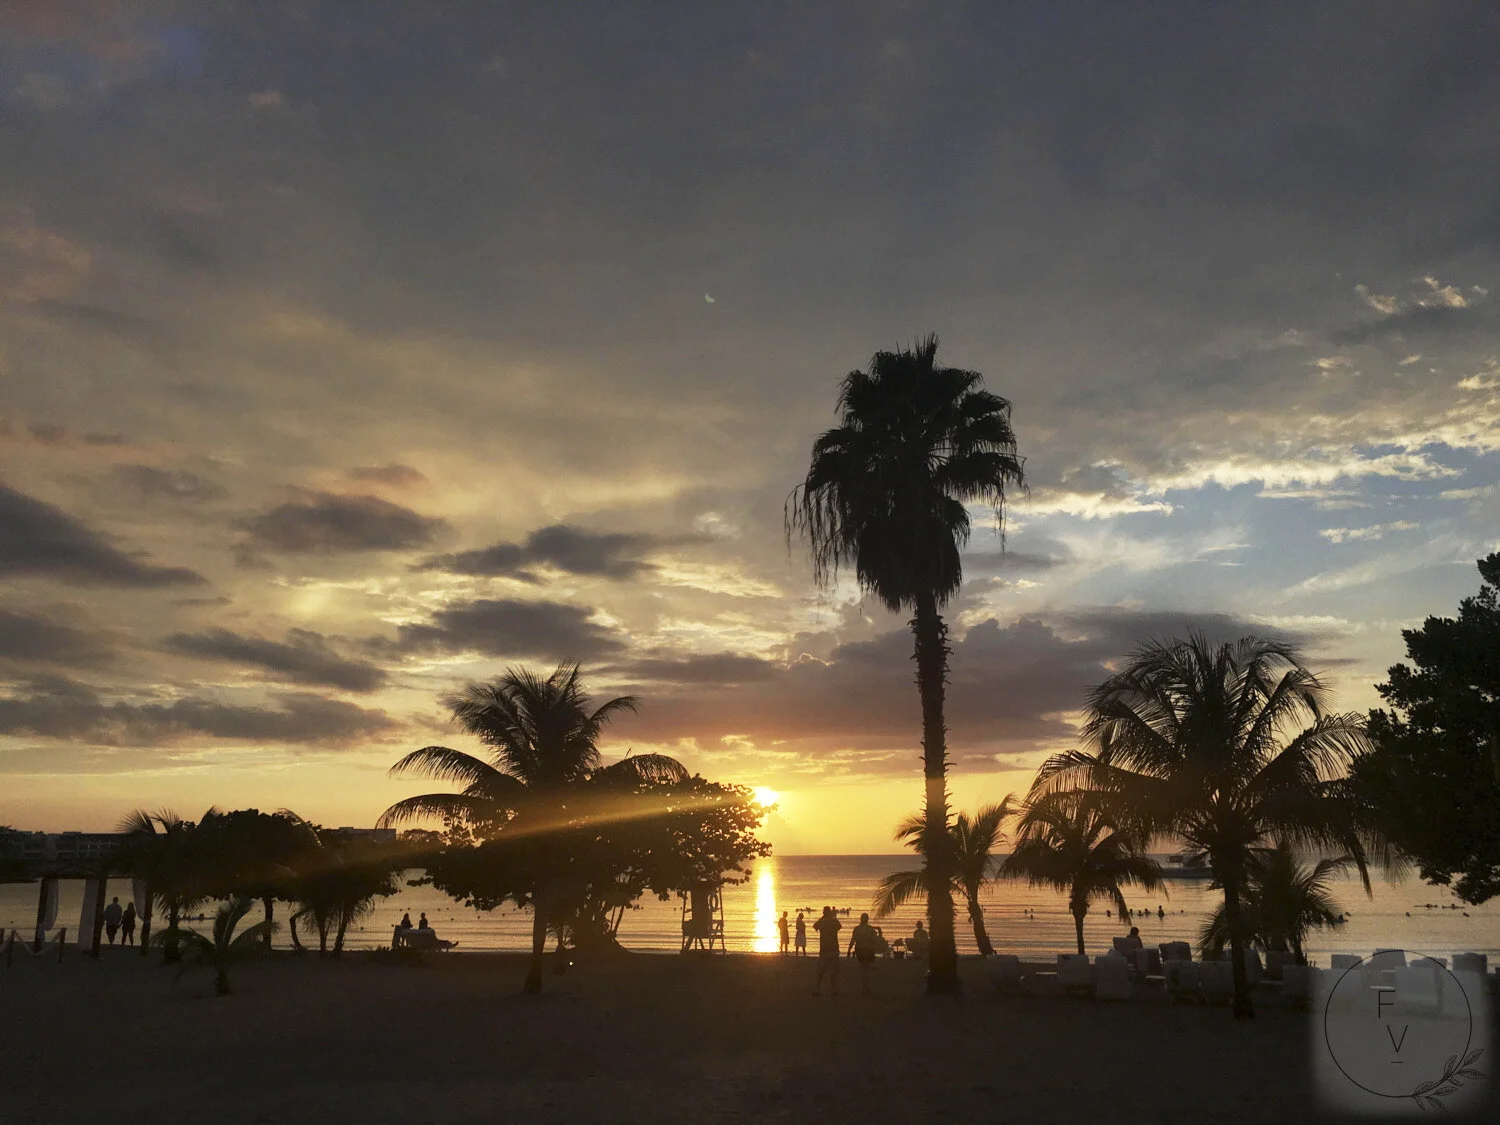
iPhone 6s while on the north coast of Jamaica
Underexposing the image simply means turning down the brightness. Some DSLR / Mirrorless cameras will have a dial or setting that can be moved to from 0 EV to -1 or -2 EV. If you are in manual mode, you can increase the shutter speed, use a smaller aperture (larger number) or reduce the ISO if you are not already at the lowest. Most phone apps also have a setting, sometimes shown as a little sun that can be dragged in a particular direction to darken the image. Some camera phone apps also have a “Pro” or “Advanced” mode that can allow you to set some parameters similar to how they can be done on a DSLR or Mirrorless camera. The objective of underexposing is to bring the brightness down to the point that the sun is more of a tiny ball than a bright overpowering light source in the scene. The image below was retaken after adjusting the exposure.

iPhone 6s on the North Coast of Jamaica - underexposed by dragging the sun icon beside the focus box
Tip #2 - Shoot RAW where possible
When taking photos, most phones and cameras have JPEG as the default option. JPEG files are reasonably small in size because they are compressed by removing information that the software has calculated is not necessary. RAW files contain all data that the camera’s image sensor was able to collect at the time the image was taken.
RAW files allow us to adjust white balance and exposure to a greater degree than would be possible with a JPEG file. Most DSLR and Mirrorless cameras will allow you to save in a RAW format but the files will be fairly large relative to JPEG file sizes. The images above were saved in JPEG using the iPhone camera app but cell phones also have 3rd party Apps such as ProCam that allow you to save in RAW format and have more flexibility in editing. The image below was taken in RAW format on a mirrorless camera.

Fujifilm X-Pro2, 16-50mm @ 24mm, 1/30 s, f/6.4, ISO-200
The image above isn’t the best image but what if there was something more interesting than the highway and we wanted to bring up the shadows to show the highway, balance it with the sky and adjust the white balance. The image below shows what is possible with RAW. If you are photographing in JPEG, you can still try to do this to some degree but if the adjustments are too great, the image will start showing numerous artifacts that will be more distracting than the benefits gained by the adjustments.

Fujifilm X-Pro2, 16-50mm @ 24mm, 1/30 s, f/6.4, ISO-200 - Edited in Capture One
Tip #3 - Change the White Balance
The White Balance of an image determines how accurate the colors in an image are by considering color casts. If the sun were to shine at a grey card, it would look more orange than grey when we look at it. The white balance is setting what the true grey point should be. Color temperature is often measured in kelvins from about 1000K to 10,000K. The lower the number, the warmer or more orange or red the tone and the higher the number, the cooler or bluer the tone. These numbers also correspond to the light bulbs. When you purchase a 3000K light bulb, it will have a warm glow. This will push skin tones and all colors in the photograph to have an orange tinge. Manually setting the white balance setting on the camera to 3000k should result in accurate skin tones if the only light source is a 3000K bulb.
For sunsets, we actually want to retain some of the influence of the colors and possibly make it even warmer. For Sunsets, the general recommendation is to set it to cloudy or shade which will be somewhere in the 6000k to 7000k range depending on the camera. You can also manually set specific kelvin values just to see how it affects the look of the scene.
If you are shooting RAW, white balance settings can be 100% adjusted in post, so I would set it to a comfortable setting and focus on taking photographs as the scene will change constantly as the sun goes closer to the horizon. The photo below was shot with auto white balance and the camera decided to use 6005K. There is also a blue green tint as it was taken through a window with a mild blue green tint.

Fujifilm X-Pro2, 16-50mm @ 24mm, 1/180s, f/6.4, ISO 200, WB: 6005 K
I adjusted the white balance and the tint manually in Capture One. The image below is was adjusted to 8302K and the tint moved every slowly slightly from the green side to the purple side. All RAW editing applications will allow white balance and tint adjustments. It is possible I might have been able to do the same thing with a JPEG but I have had cases where the colors started to fall apart as there was not enough data to make such a major change. There is no correct or incorrect way to set the white balance for a sunset. It is more able making it as warm as you would like to capture the mood that was present while not making it unnaturally orange to the point of it being distracting. What is considered distracting is also subjective. When watching a movie again, pay attention to the colors. They are often pushed one way or the other while trying to maintain some kind of accuracy for skin tones.

Fujifilm X-Pro2, 16-50mm @ 24mm, 1/180s, f/6.4, ISO 200, WB: 8392 K
Tip #4 - Pay attention to Composition and location
It is easy to get lost in the beauty of the scene and forget about framing, horizon and subject placement. Keep the horizon level and use the rule of 3rds to assist with finding an interesting composition. Depending on how dramatic the sky is, it may be desired to move the horizon down or if the foreground is more interesting, move the horizon up. You can also change to a portrait format as shown with the image below. It is also important to try to have line of sight of the horizon as much as possible. Most of the beauty of a sunset occurs as the sun gets closer to the horizon. If there is a large mountain, trees, buildings or some other structure blocking the horizon, the sun may not be visible when the light changes.

Fujifilm X-Pro2, adapted Canon 135mm f/2 L (~203mm equiv), 1/240 s, f/2, ISO-200
The image below was captured from a fairly high vantage point on a hill with a clear view of the horizon.

Canon 5D, Canon 35mm f/2, 1/125 s, f/9, ISO-100
Tip #5 - Use a Tripod and self-timer or steady surface to rest your phone or camera
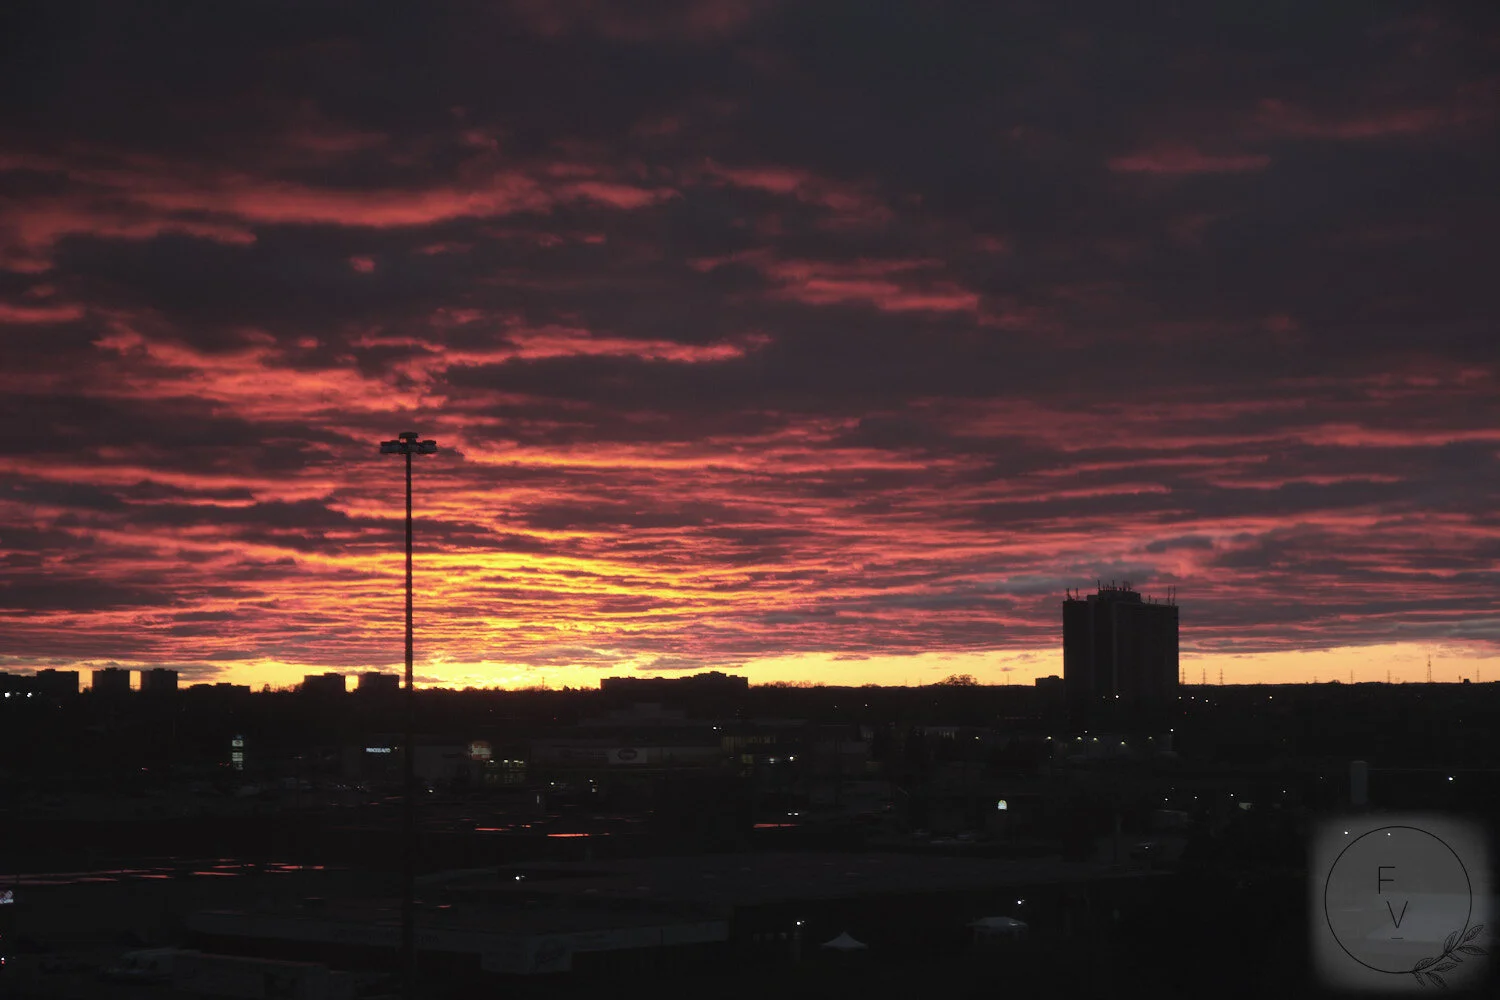
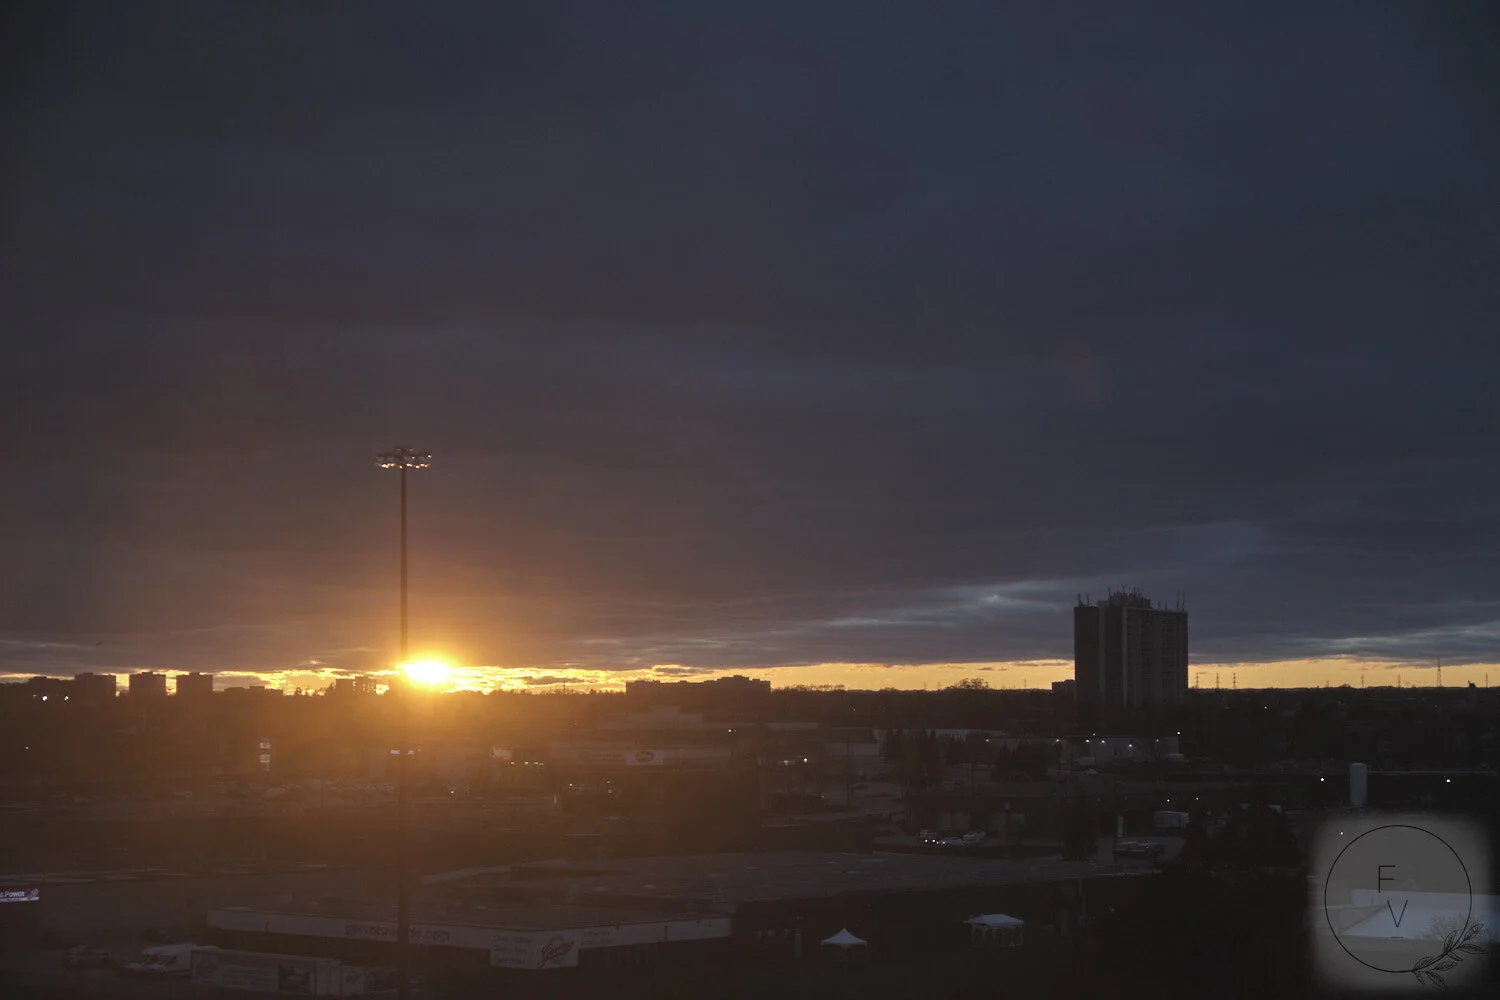
As the sun disappears into the horizon and golden hour shifts into blue hour, the available light will diminish. This will require higher ISO values, wider apertures or slower shutter speeds to get a sharp photograph. If you are hand holding the camera, the shutter speed could get so slow that shake occurs as shown in the photo below.

Fujifilm X-Pro2, 16-50mm @ 50mm, 0.91 s, f/6.4, ISO-200
For the image above, being able to keep the ISO at 200 will result in the best quality. The aperture can be reduced from f/6.4 to f/5.6 but there is no guarantee that will allow the shutter speed to be increased enough for a sharp image. The light will also be falling quickly at this stage. Within minutes, you may be taking 10+ second exposures if you continue to shoot as lights appear in the windows of the buildings and the hues in the sky changes.
If I was out at dinner and the opportunity came up, the best options would be to find something to rest the camera on without compromising the composition too much or just increase the ISO. A noisy ISO-2500 photograph of a beautiful golden hour shot after sunset is better than no photograph at all.
The self timer option on the camera or a remote shutter release can be used so that the camera does not move when you take the photo. If the shutter speed is slow enough, it is possible to create a blurred photo in this way.
If you are planning to photograph sunsets, carry the tripod just to be safe if you can.
Tip #6 - Pay attention to everything around you including what is behind you
It can be tempting to focus only on the sunset but sometimes it is beneficial to look around and see what else is visible from your location. The photograph below shows the reflection of the sunset in buildings with a interesting hues in the clouds.
Fujifilm X-Pro2, 16-50mm @ 16mm, 1/45 s, f/4, ISO-200
Tip #7 - Create a Silhouette with a foreground subject
While underexposing the image to achiever details in the clouds and sky, it will darken any subject in the foreground. If This is a model shoot, you can light the model with off camera flash trying to balance it with the sky for a nice effect but sometimes we can just intentionally have the subject completely under exposed. The trees at the bottom of the photograph look better as a silhouette as opposed to trying to increase exposure in post. It allows us to focus on the sun rays and tinges or orange being sprinkled onto the clouds.

Fujifilm X-Pro2, 35mm f/2, 1/1600 s, f/2, ISO-200
The image below would have been less interesting if the foreground was properly exposed but the sky was over exposed.
Fujifilm X-Pro2, 16-50mm @ 50mm, 1/20 s, f/5.6, ISO-200
I tried pushing the limits in post just to see what it would look like. The version above looks better than the version below in my opinion.

Tip #8 - Keep your lenses clean and try to avoid photographing through windows or using filters
Photographing through windows can sometimes have reflections or show dirt on windows. The more underexposed the image, the less obvious the dirt will be as can be seen in the examples in Tip #2 and Tip #5. The iPhone image below shows some glare from the sun. This often happens when the camera has dirt or even fingerprints on it. Just wipe off the phone lens with a soft cloth. If you have a DSLR or Mirrorless camera, please use cleaning solution and a proper microfiber cloth. Using the wrong cloth or wiping a dry lens could result in scratches. There are some minor reflections in the image below in the center to left of the top of the tree. These are more than likely due to the iPhone’s lens. When photographing a sunset, it is also good to move the camera around to determine if any interesting sun rays or light flares can be achieved.
iPhone 6s
The image below has an interesting glow due to the dirt on the window.
Tip #9 - Photograph during Golden Hour and continue into Blue hour
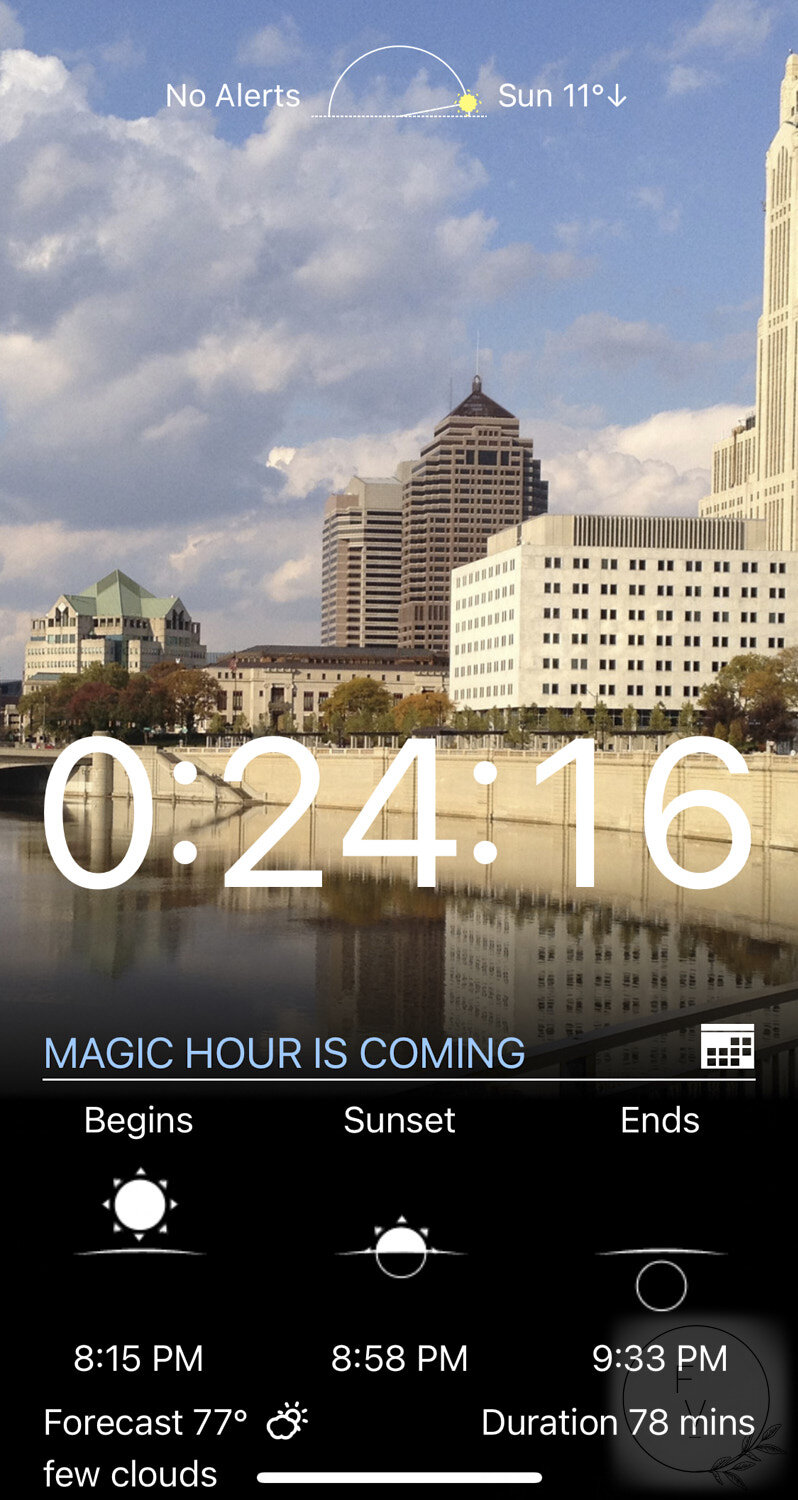
Golden Hour is mostly considered to be 1 hour before the sunsets or 1 hour after it rises. The duration and time can change based on the location and time of year. There are many Apps that can be used to calculate the exact time of golden hour in your location. I use an app called Magic Hour. I just took the screenshot below from my phone and I normally use it when planning when to be a location for a sunset or when to look out for the sunset if I already have a good vantage point. Golden Hour is not only good for sunsets, it is good for photographing anything. Many professional photos done in natural light are done during golden hour for this reason.
The photograph below was taken during Blue hour after sunset as the lights started forming in the windows. This is a fairly bland scene but could be quite spectacular if there was a view of a bubbling city.

Fujifilm X-Pro2, 35mm f/2, 1/6 s, f/2, ISO-400
Tip #10 - Use the lowest possible ISO
This tip is directly related to Tip #5 but if you are hand holding it is easy to get carried away increasing the ISO on the camera to maintain sharp shots. The screen on the camera often does not show how much noise is being introduced by increasing the ISO. I would suggest practicing with your camera at various ISO settings so that you know ahead of time which ISO values you are comfortable with.
If you are using a cell phone, the options to control the ISO is often not available. As the scene darkens the camera software will increase the ISO automatically. You can use 3rd party applications to control this but you may need a tripod. One strategy is to hold the camera up against the window which will keep it steady enough for very slow shutter speeds. The image below is a screenshot of an app that I use called ProCAM. It also supports photographing in RAW. Yes, the camera lens and the window is not very clean resulting in the vertical lines.

ProCam running on an iPhone X
Tip #11 - Try various focal lengths
As a general rule of thumb, the wider the focal length of the lens, the smaller the definable area of the sun will be. If the sun seems fairly large as it approaches the Horizon, a longer focal length lens will emphasize this. The image below was taken with a 35mm lens (~52mm equivalent) The sun is only so large due to over exposure.

Fujifilm X-Pro2, 35mm f/2, 1/1900 s, f/2, ISO-400
The image below was taken with a 135mm lens (~202mm equivalent)

Fujifilm X-Pro2, adapted Canon 135mm f/2L, 1/900 s, f/2, ISO-200
The image below was taken with an iPhone X. You are still able to capture beautiful sunsets but achieving the look above would be unlikely

Apple iPhone X
Tip #12 - Look for reflections
Capturing reflections in images in general can add a lot of interest. This is more noticeable for sunsets. Notice the reflection of the sun along the water onto the wet area of the beach in the image below. You can also look for the side of buildings or a low shot from a puddle of water. Anything with reflections can make your photo more interesting.

Apple iPhone 6s
Tip #13 - Pay attention to the Weather Forecast
The weather forecast is very important when planning to capture sunset photos. The obvious concern would be if it rains during sunset there will be no sun to capture but rain followed by partly cloudy right before sunset normally leads to a beautiful scene. The photo below shoes a variation of interesting tones in the clouds as rain moved to the east while the sun neared the horizon.

Fujifilm X-Pro2, 16-50mm @ 50mm, 1/1300 s, f/6.4, ISO-200
Tip #14 - Determine if manual focus is needed
Having a bright light source shinning directly in the lens can confuse the autofocus mechanisms in the camera. This will be less of an issue if you are using a cell phone as most of the scene is likely to be in focus but if you are using a DSLR or mirrorless camera with a longer focus length or wider aperture, it is important to pay attention to. In the image below, the light post is in focus but the camera could easily have focused on the background instead or missed focus entirely based. Due to the small size of the display on the back of the camera, a slightly out of focus image may not be noticeable until you look at it on a larger computer monitor but it will ruin the photograph.

Fujifilm X-Pro2, 35mm f/2, 1/340 s, f/2, ISO-200