
How to copy RAW files from iPhone to a Windows PC using ProCam
With the iPhone 12 Pro, Apple introduced Apple ProRAW. If you do not have a iPhone 12 Pro, you can use a 3rd Party application to take RAW photos.
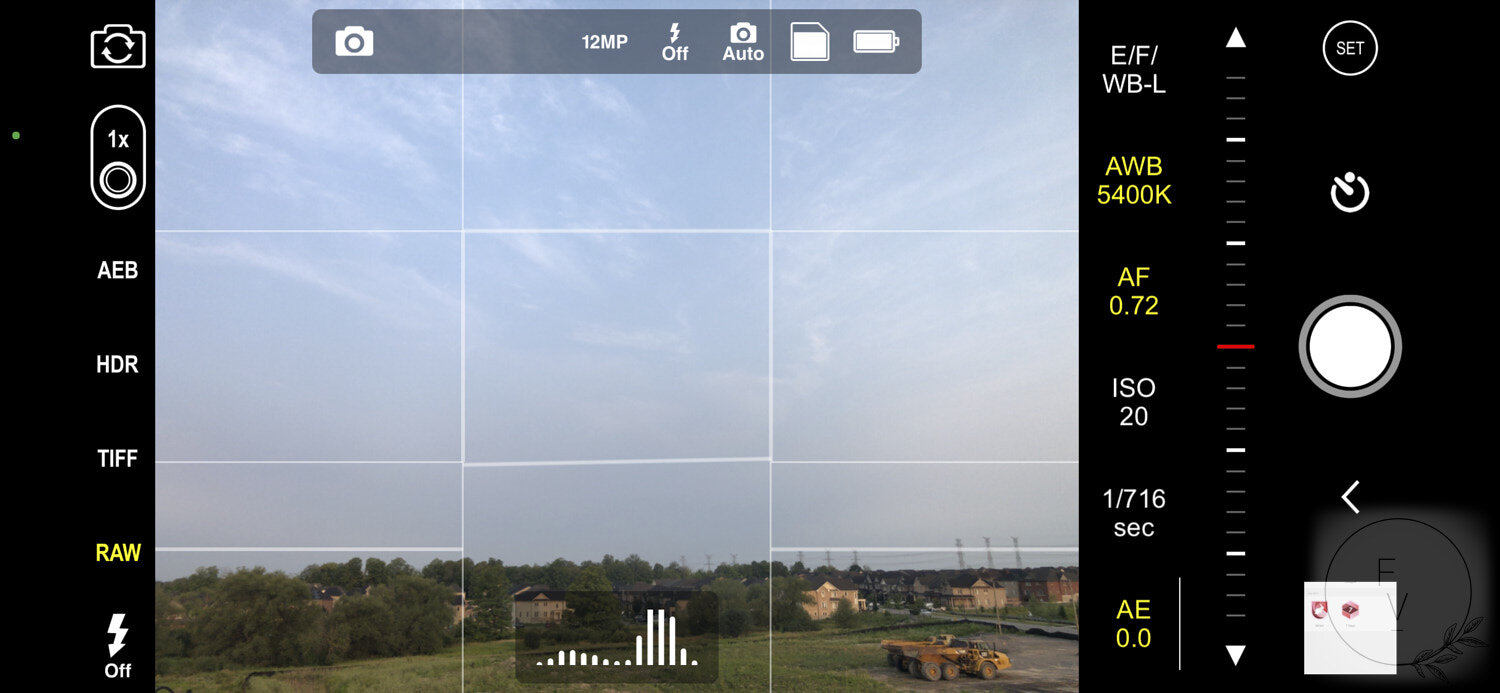
I have used many apps but tend to use the ProCam or Halide iOS apps the most for RAW photos. The issue I generally encounter is that while the photos show up as RAW in the photos App as shown below, they only show up as JPEG in iCloud.

Viewing a RAW file in the Photos App
I have found that using a file sharing service like MS OneDrive works for copying the DNG files over to a Windows PC. However, it will not allow you to upload too many files simultaneously. When trying to select over 180 files to upload in one sitting, it only showed one file in the upload screen. I am not sure what determines how much you can upload. I am using a 64gb iPhone X with limited space so some of the files had to be downloaded to the device before they could be uploaded. I used ProCam to select the DNG files and upload them to OneDrive. This has also worked in some cases selecting the images from the Photos app. To upload to OneDrive, follow the steps below.
Tools Needed:
iPhone
ProCam or similar app that captures RAW files allows you to export them
Windows PC
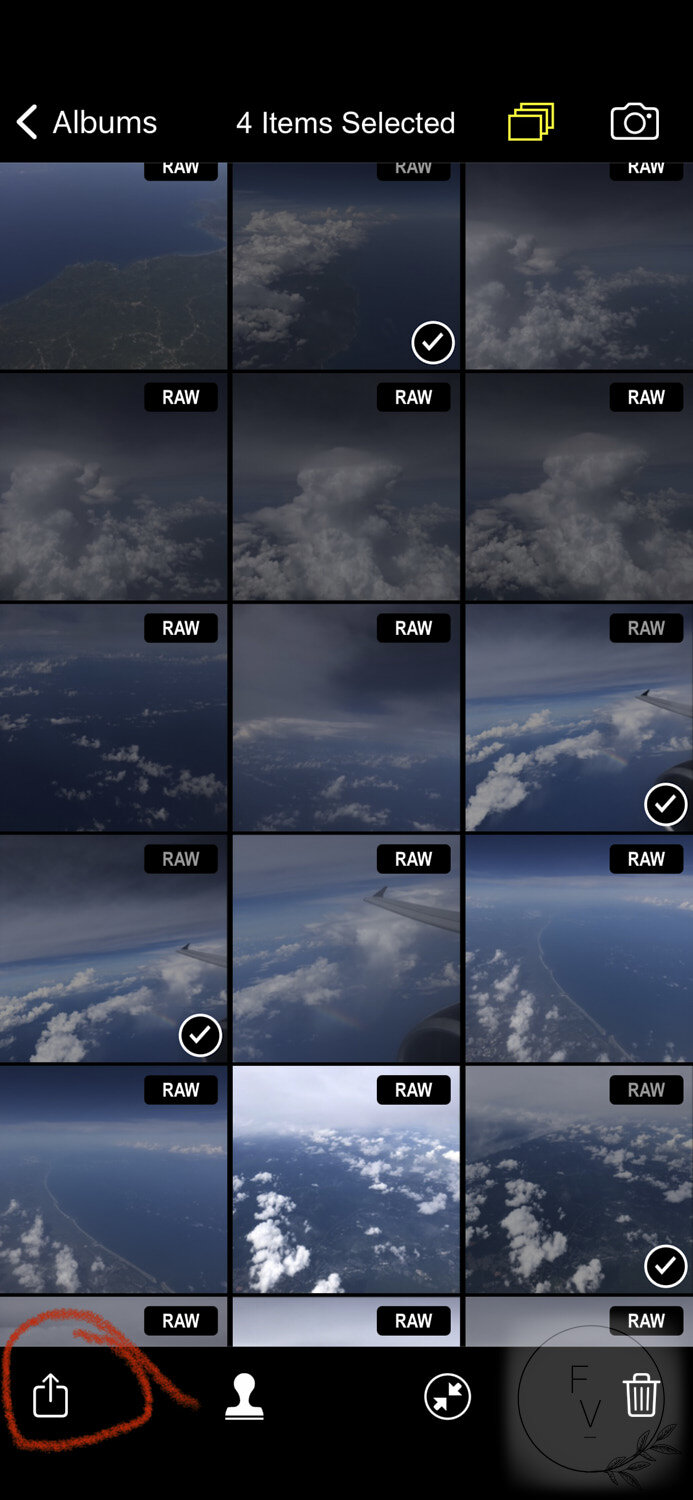
Step 1: View gallery in ProCam and tap the select multiple photos icon circled below

Tapping this icon will allow you to select multiple RAW files.
Step 2: Select the RAW files that you want to upload

When selecting multiple RAW files, do not select too many simultaneously
Step 3: Tap the Share Icon
The share icon will provide various options for sharing the selected files

Your phone may take some time depending on the model and how many photos were selected.
Step 4: Choose OneDrive as the option to Share
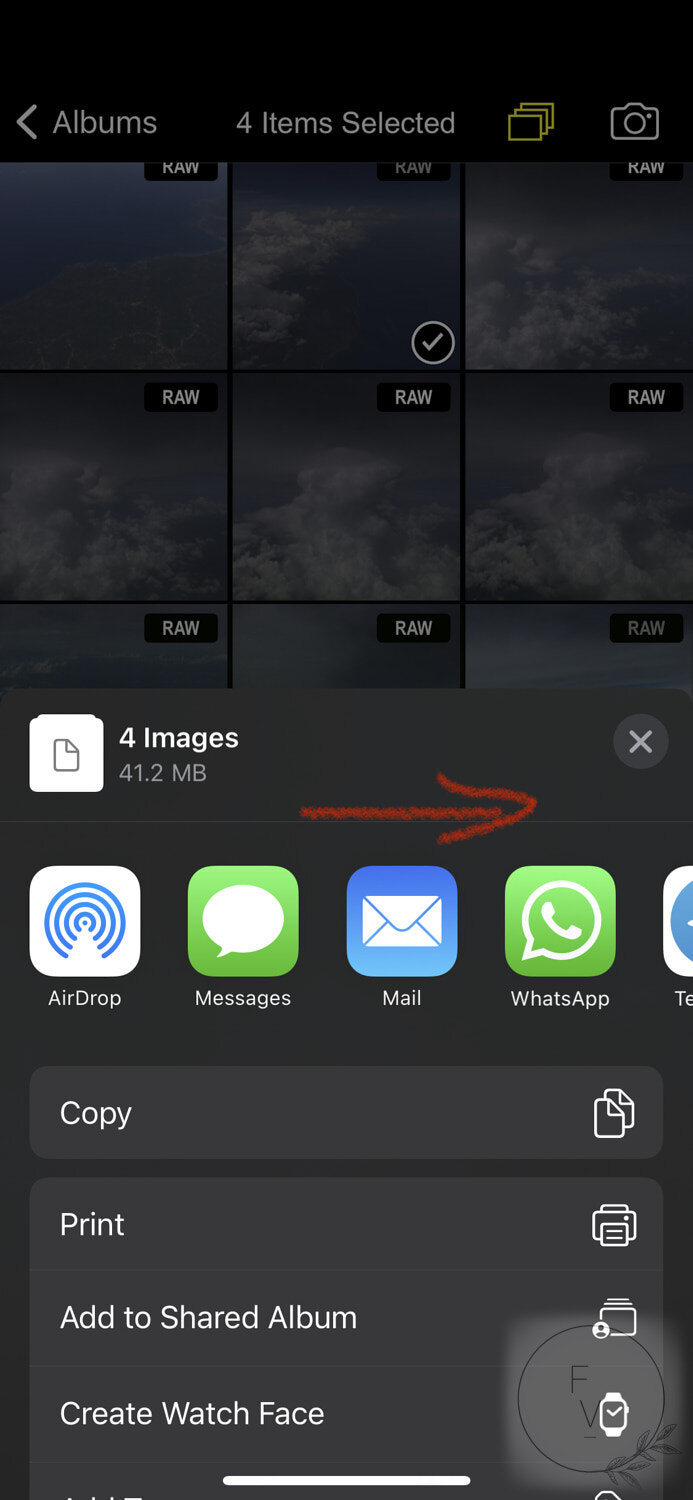
You may have to slide across to find it

Tap OneDrive as shown in the circle above
Step 5: Verify the files and choose Upload
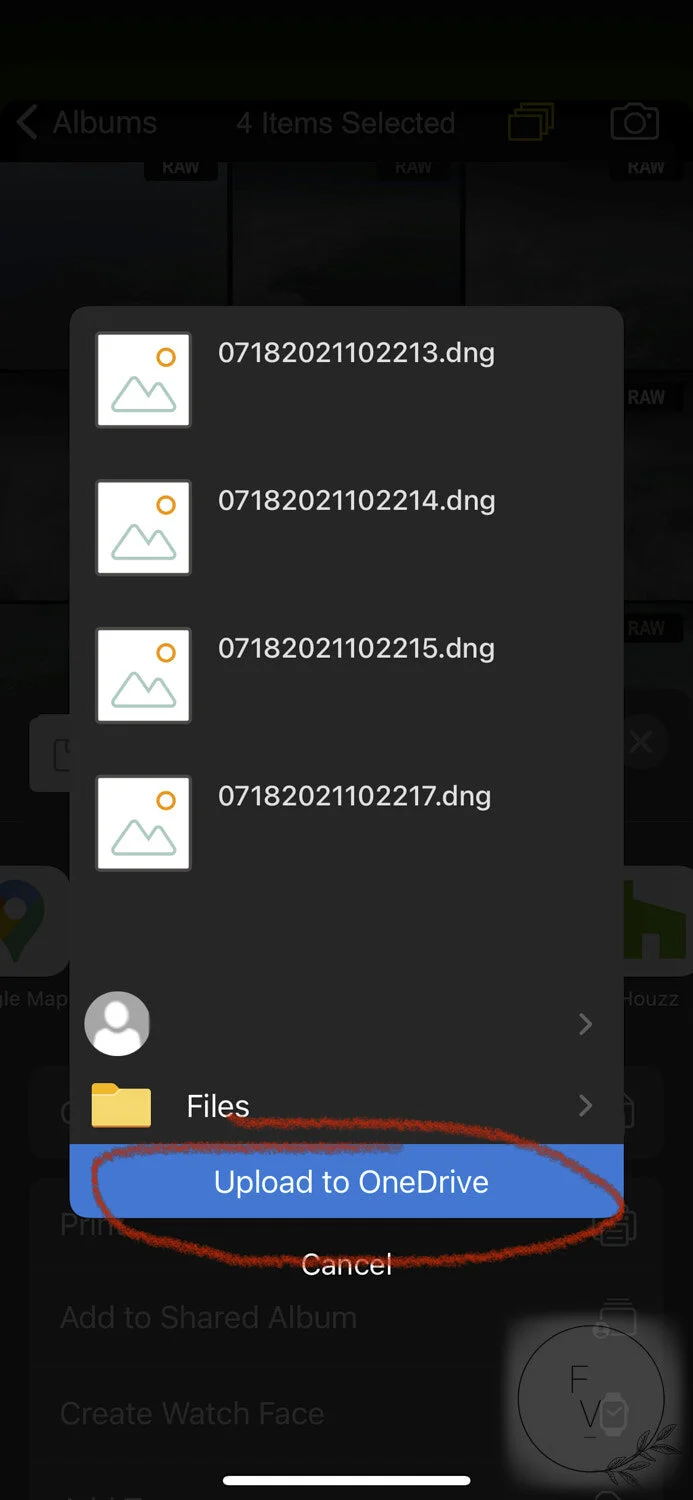
The files selected will be shown and the option to upload to OneDrive will be given. If too many files were selected, it may show just one file.
Step 6: Confirm that the files are present in OneDrive

Once the DNG files are visible in OneDrive, you can login on a PC to download them
If you would like to see more content related to Mobile Photography, please leave a comment below.